| |
Alan
Will ATTEX
into a SPRINGER
Newest information towards bottom of
page
|
Click on Photo |
| |
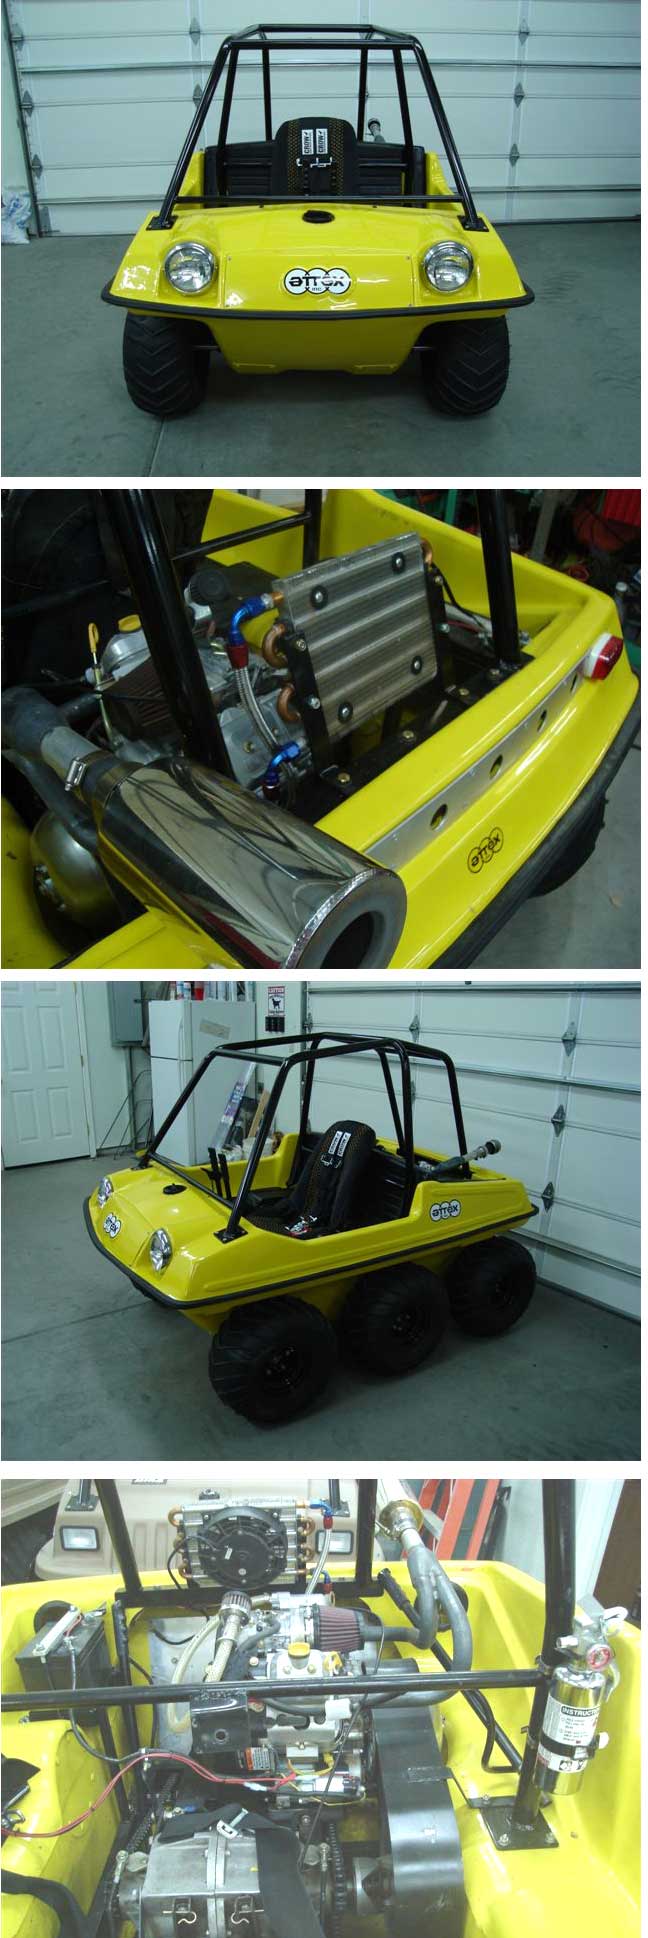
Hi Richard & everyone @ Route 6x6.
My name is Whipper & I live in Phoenix, Az. Since the early
70's, I have
always wanted to build a 6x6 Springer. About a year ago, I bought
an Attex
on e-bay.
The car was in pretty good shape, but needed a total restoration.
I
never liked the small 1" axles on the Attex, so I took the
frame out & cut
off the outer side rails & replaced it w/4" channel so
I could run 1 1/4"
axles. I also put larger bearings on the inside & made my
own splined axles
& sprockets. I added some Max chain
adjusters, front & rear. I threw the
twin cylinder 2 stroke away & bought a 50 hp Briggs &
Stratton from
Performance V-Twins. It has 10.5:1 compression & I have to
run AV gas.
I sanded the body & had it painted corvette yellow. I also
built a 6 point
roll cage for it & fabricated a new aluminum dashboard.
I know this started out as a restoration, but I was really building
an Attex racer. My top speed when I got it together was 58mph
with no suspension. That's when I decided that this was the car
I wanted to make a Springer. These are just a few pics, so you
can see the transformation. When I get the time, I'll post more
details of how it became a Springer.
Whipper |


|
| |
|
|
| |
|
|
| |
Second Installment |
|
| |
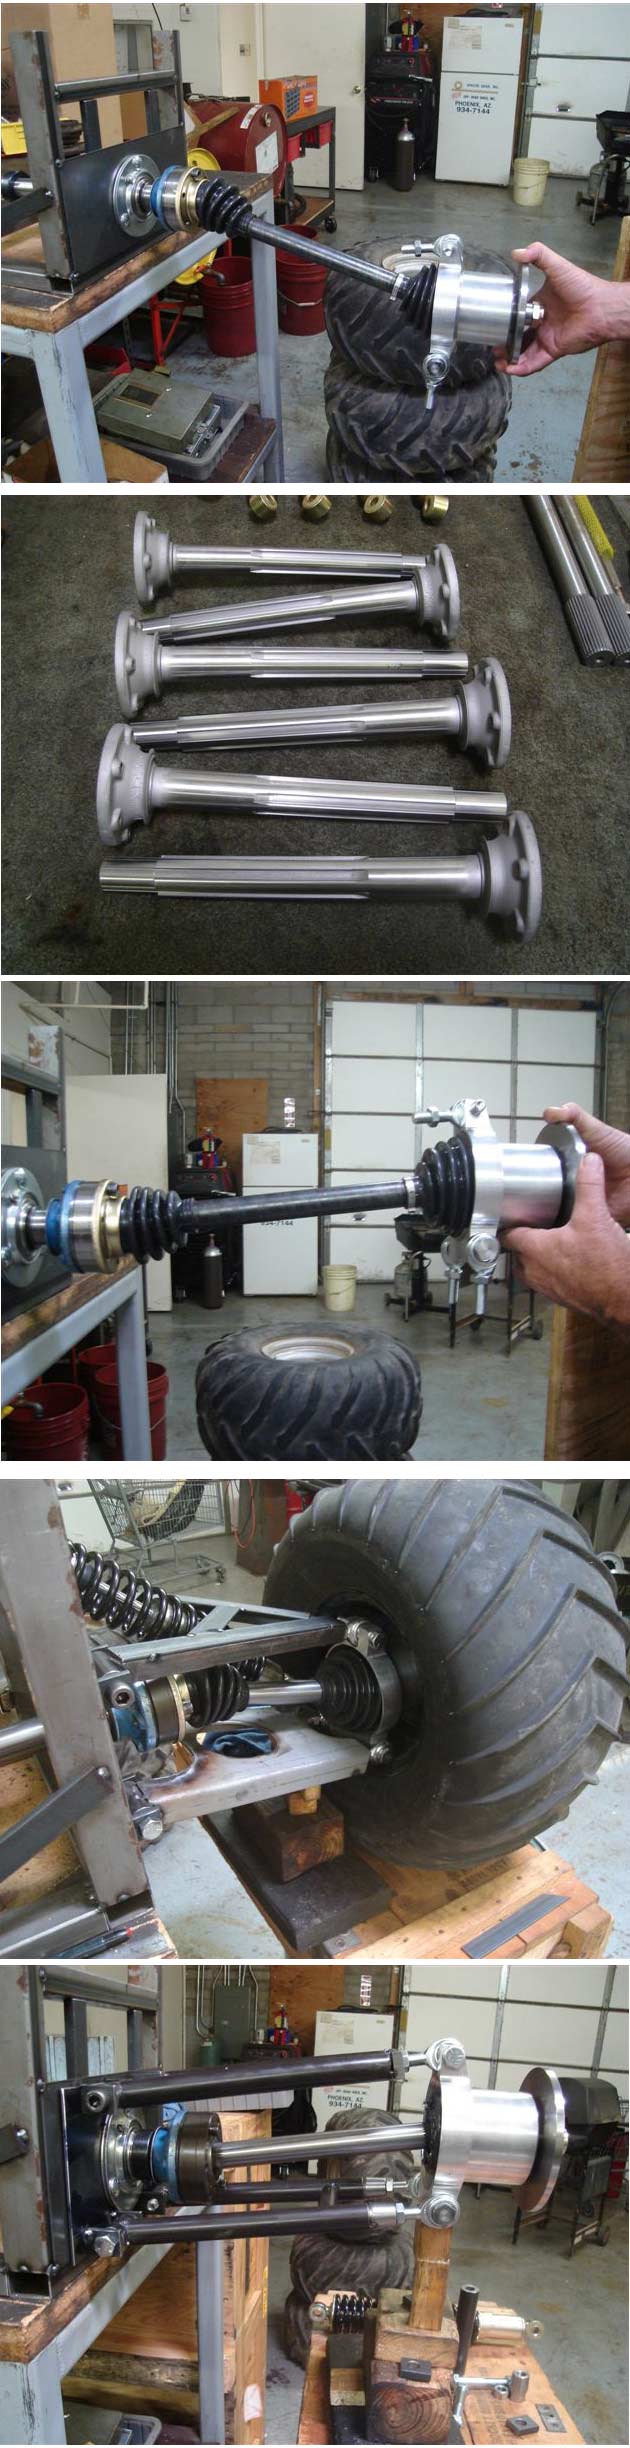
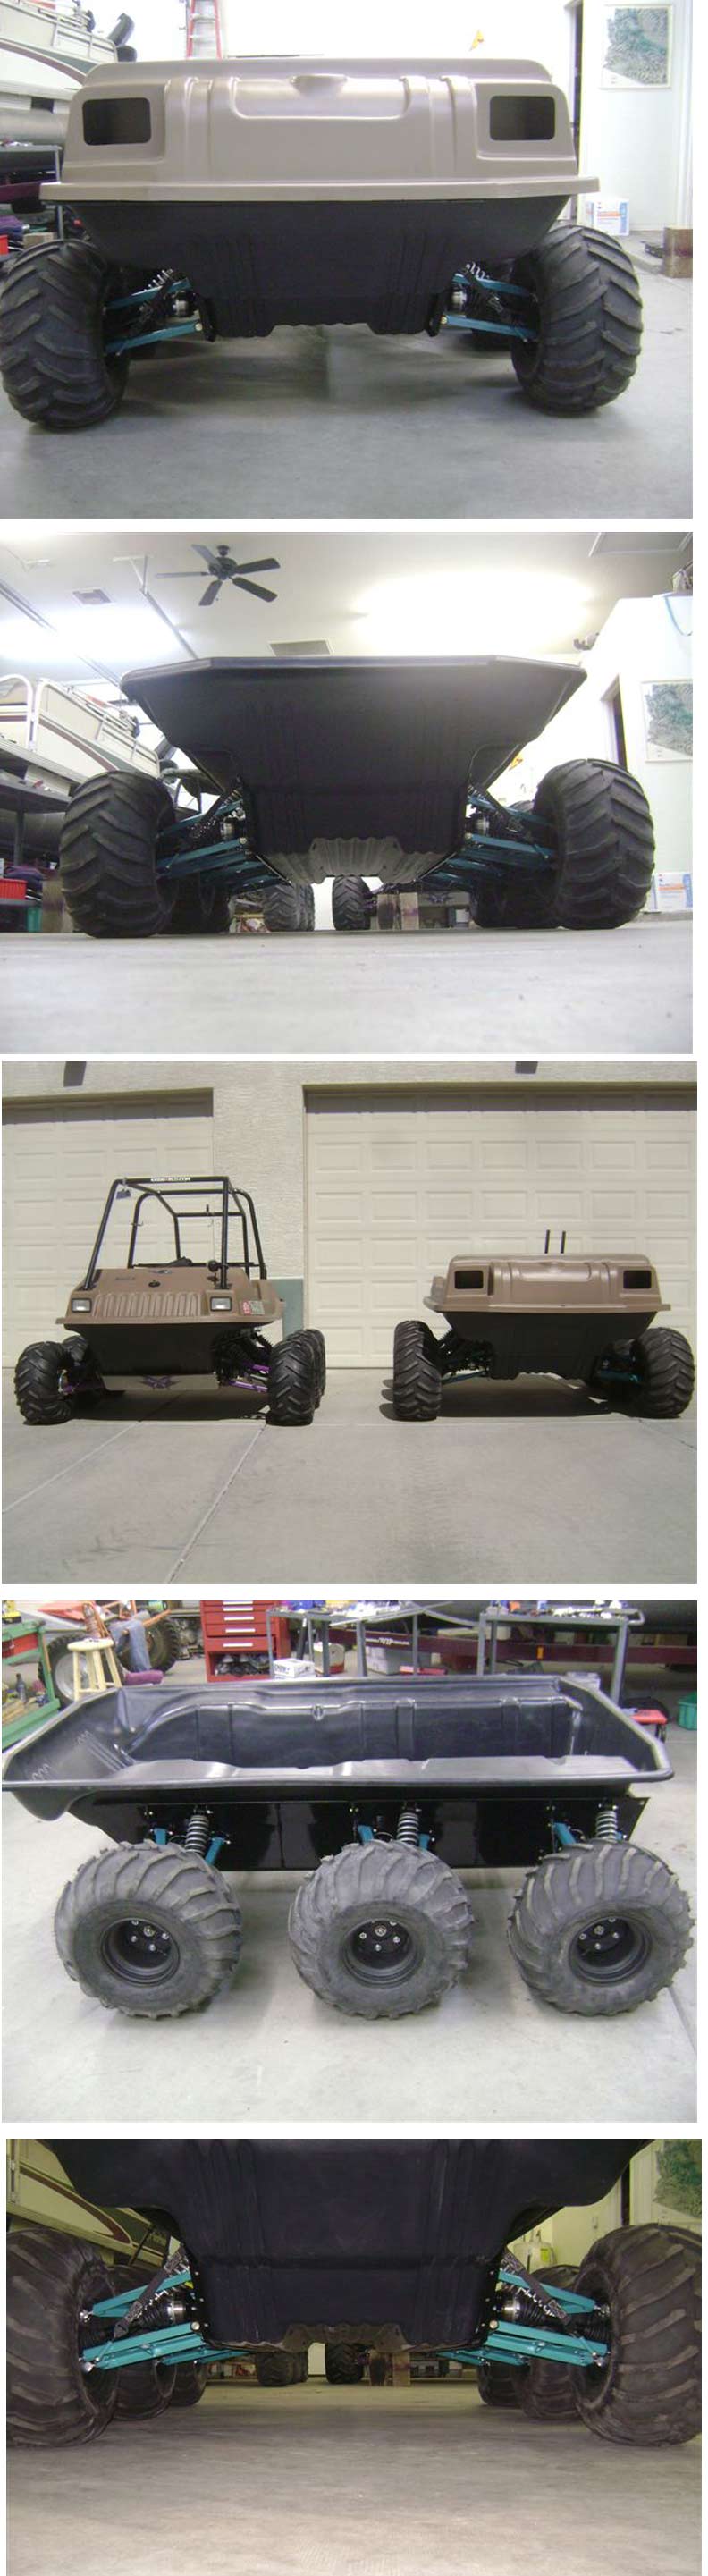
Now with the Attex complete and running, I could
tackle the next problem- how to make a bolt on Springer Kit and
still make the car seaworthy. I decided to use a sideplate that
would bolt up to the same holes as the bearings, so I moved the
bearings to the outside of the plate. Now I would have something
to attach all the suspension parts to. The next thing needed was
a bearing carrier and a spindle to attach the wheel. I went with
a VW rabbit front spindle & bearing, and all I had to do was
make the carrier.What made this pretty easy to do was the wheels
only had to go up & down and not turn. So with an upper &
lower trailing arm, all they had to be was the same length and
the wheel would stay straight throughout its travel. I came up
with all kinds of ideas for the arms. I started out using chrome
moly tubing, but that didn't work out. It would have been too
much welding and too many jigs & fixtures. I ended up using
11 gage steel and had them cut on a water jet and formed in a
press brake. Now, the only fixture I needed was one to set all
the tabs in the right position. Since the outer rabbit spindle
had its own CV joint, I had to come up w/ a CV joint for the inner
axle just outside the body. For that I used a Type I VW CV joint.
I had to make all new inner axles w/a VW flange to accept that
CV joint. Then all I had to do was make the outer axles to connect
the 2 CV joints.
Whipper |

|
| |
|
|
| |
Excellent movies of the Springer in action, from
the Verde River in AZ
Movie
#1
Movie
#2 |
|
|
| |
|
|
| |
Third Installment |
|
| |
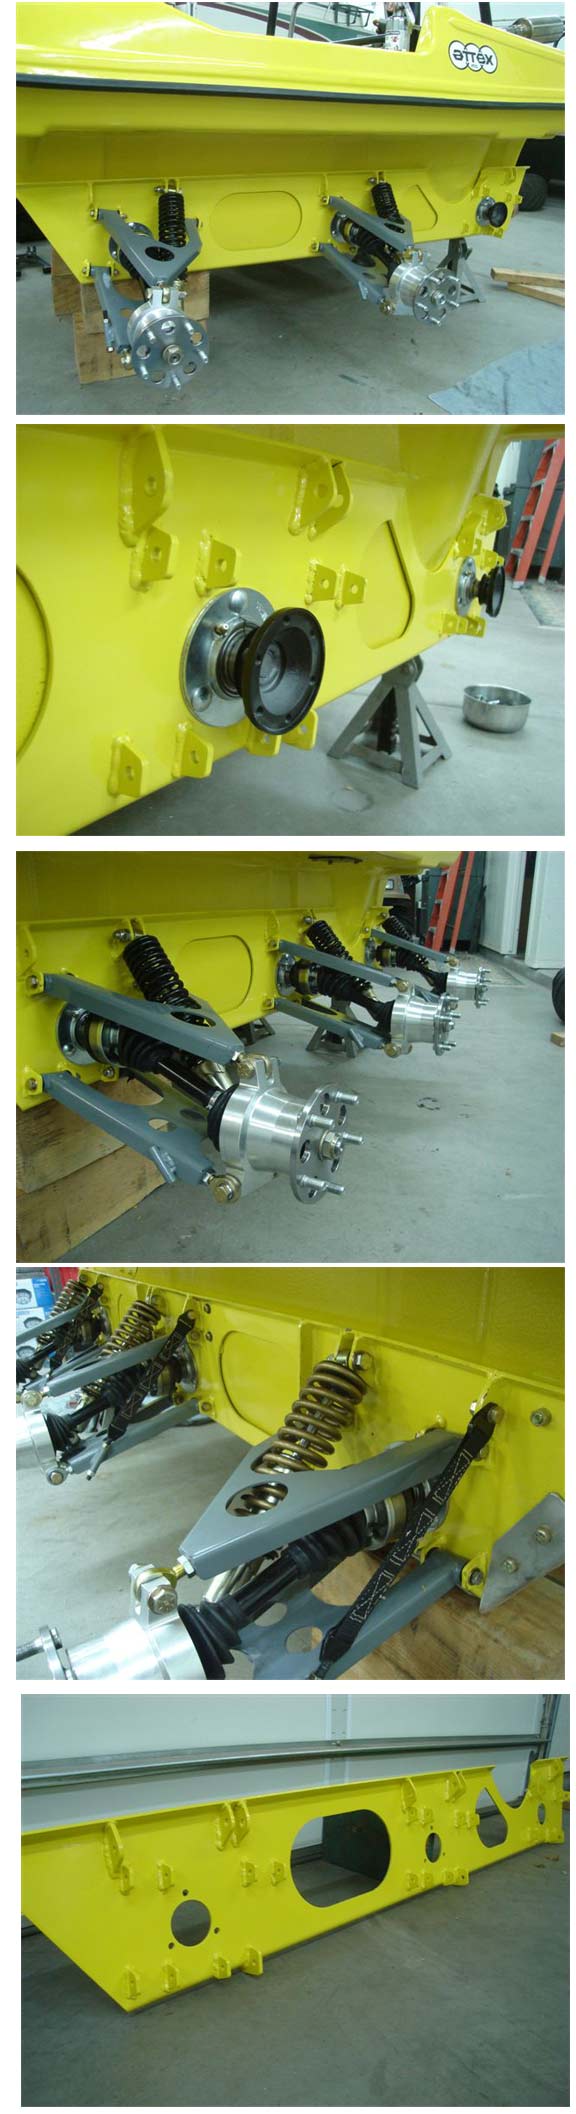
Now with all the parts done it was time to assemble. One
of the last things I had to make was a weld fixture to locate
all the tabs that would hold the trailing arms and the shocks.
If you noticed the arms are tilted back at 10 deg, That was
to make an easy transition through it's travel and not force
the wheels straight up and down. Now the wheels would travel
back and then up.That makes for a very smooth ride.The weld
fixture was made with 2 locating pins so I could tilt the arms
10 deg in the opposite directions for the other side of the
car. The side plate has two 60 deg bends, top & bottom in
opposite directions, the top one bends out to hook the shocks
to and the bottom one goes under the car. Those 2 bends made
the plate very strong and not able to flex.The plate bolts to
the stock bearing holes in the car with the flanges and bearings
on the outside of the side plates. Then just bolted everything
on to the tabs.I had guessed on the spring weights to start
out and it was to weak and ended up with 200lb springs. That
worked out perfect.
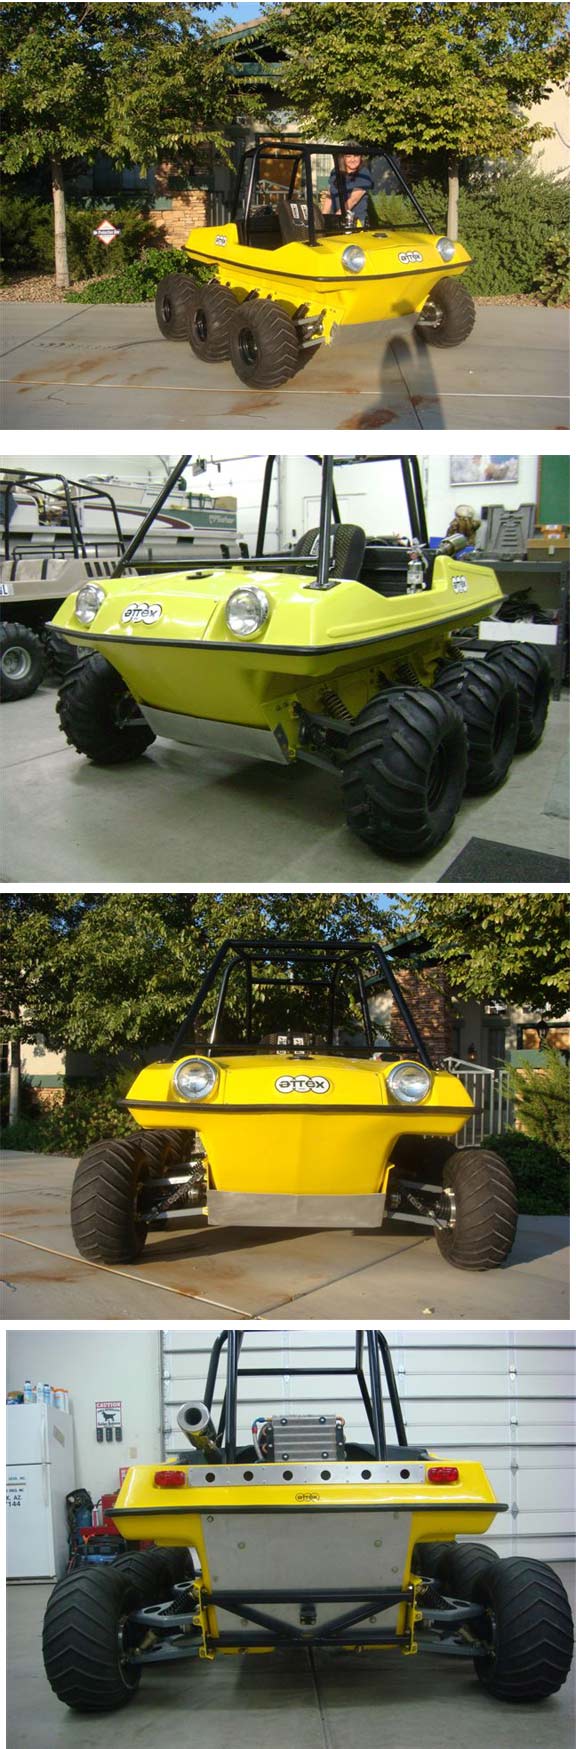
It is truly a pleasure to ride a 6 wheel ATV at it's full potential,
I can now ride as fast as I want and have total control , and
not have to slow down for every bump, hole and rock in the road.I
can keep up with quads, rhino's and sand rails, and I never
have to worry about bending an axle ever again.I tend to go
overboard sometimes and some people call it overkill, but it
is truly maintenence free, and that is what I was after. More
ride time! I just finished a Springer kit for my wife's Max
II. I made a few changes and upgrades I'll post some pics of
it soon.And yes the cars still float! I hope to make these kits
available in the near future.I've got a lot more road testing
to do first. This kit does provide 6" of full wheel travel.
Whipper |


|
| |
Great Videos of Alan Will riding
in the AZ desert
Video
#1 ............Video
#2...........Video
#3
Video of a MAX II with suspension
system
Video
|
|
| |
|
|
 |
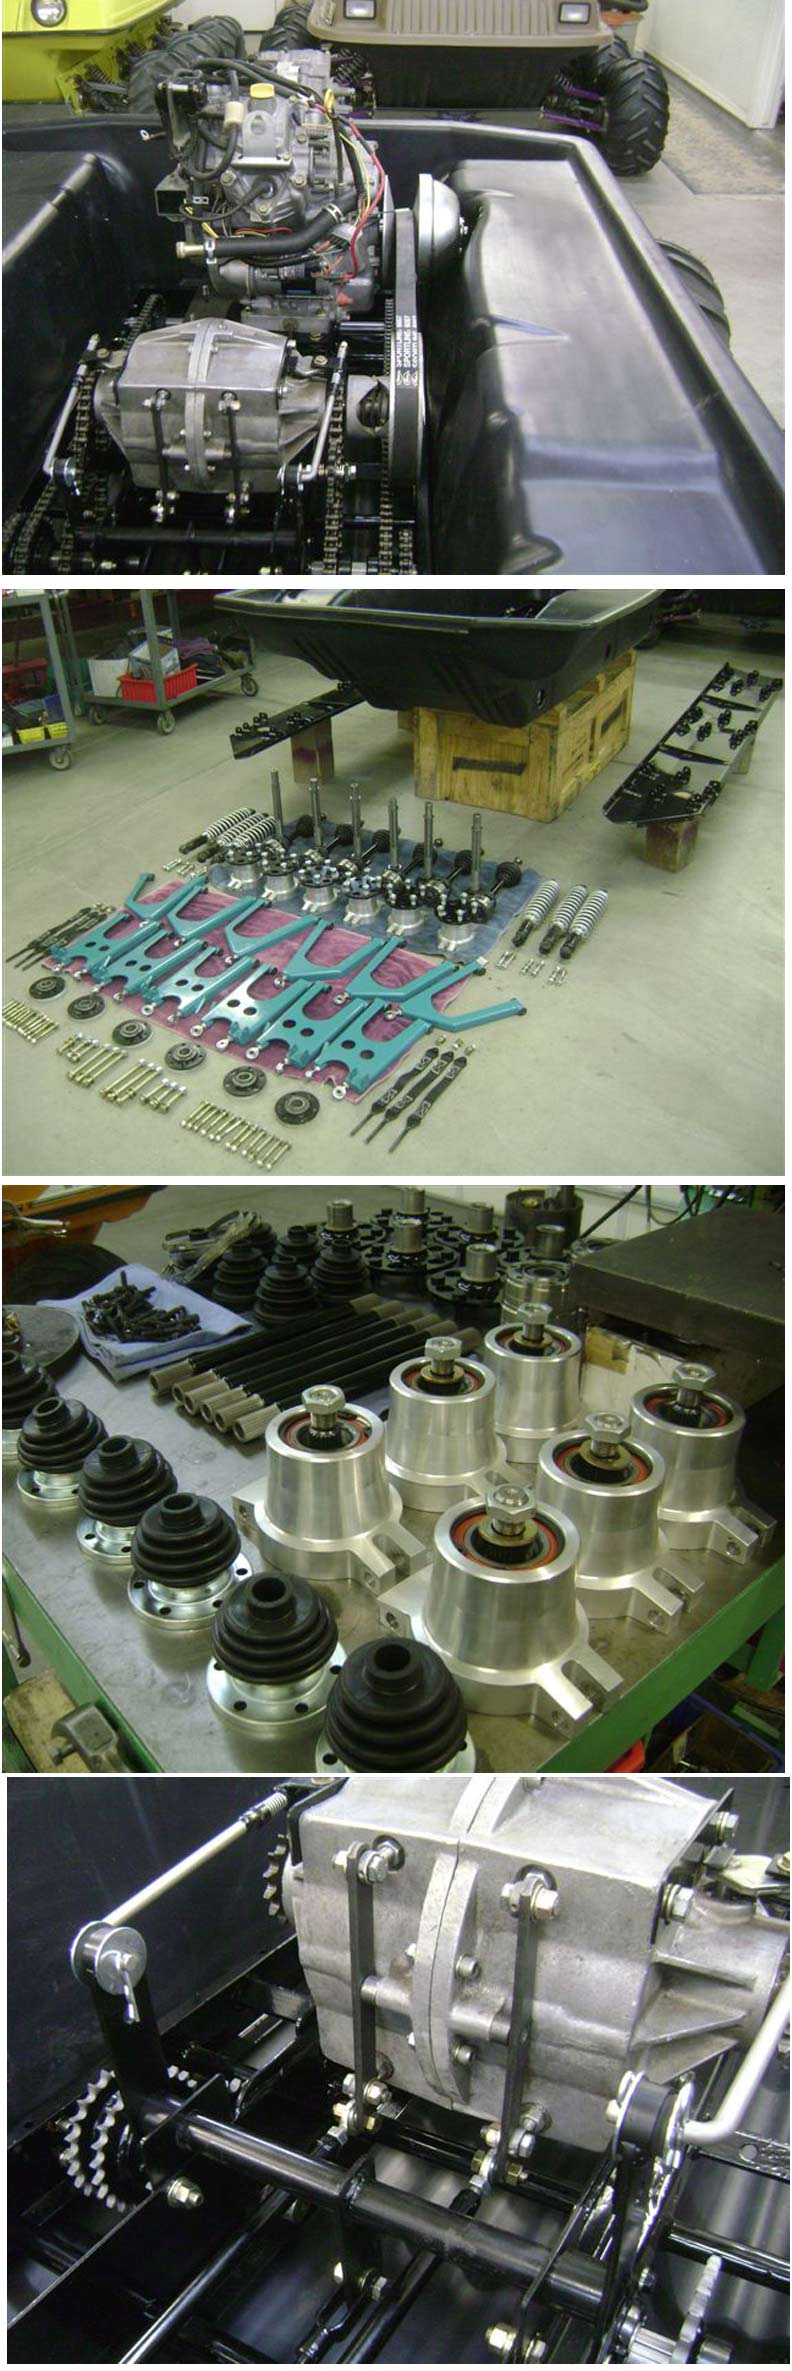
My Attex springers & my wife's Max II SS (Super
Springer) were everything I hoped for. I guess I couldn't stop
there. I decided to springer a Max IV.
The donor frame was out of a 1979 Max IV. I threw the body away,
rebuilt & relocated the T-20 & modified the frame for
Max II chain adjusters. I modified all the linkage to heim joints
& fabricated an adjustable motor mount. The motor is a 60
hp water cooled hi-performance V-Twin Briggs. I hope it's enough
power.
It's not being built as a 4 seater. My intent is to have a big
2 seater w/ plenty of room to store behind the seat ,camping gear
& supplies.
With most of the modifications done that I wanted to do to the
frame, it was ready to get springered. Still lots to do. I'll
post more pics as we progress. Here's a video of how we assembled
Godzilla in under 7 minutes.
Whipper |


|
| |
Video
of how we assembled Godzilla in under 7 minutes |
|
| |
|
|
| |
|
|
| |
|
|
|