 |
|
|
Step - by - Step How to Vanguard
Carburetor Cleaning This is another
addition to our new how to series, we will ba adding more every week,
so check back often. You may also e-mail suggestions for future how -
to's to. richard@route6x6.com
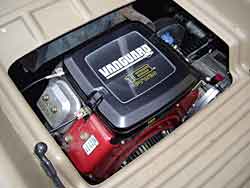
Briggs & Stratton 14-18hp Vanguard Carburetor Cleaning Is your engine surging or just running bad? This is a common problem due to todays poor gasolines that do not last very long durning storage. Dirt, Varnish and gum deposits on the jets, therefore plugging them up, causing poor running, the only solution is to clean the carb and jets and be sure to install a new fuel filter, consider using a fuel stablizer. Below is a step by step "HOW-TO" to do this necessary job. |
|
 |
Always disconnect negetive battey cable before servicing your machine. |
 |
Most
machines are equipped with a fuel shut off switch, turn fuel off, or
pinch rubber fuel line with small vise grips if your machine does not
have a fuel shut off switch. |
 |
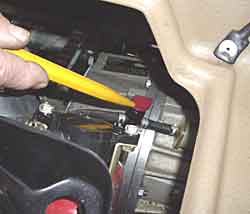
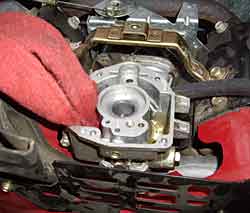
Shown
is air filter base, yellow pointer shows the three or five bolts to remove
to take air filter base off, set aside. Note; Make sure you do not drop anything down in carb, also note location of black vent tube under silver bracket |
 |
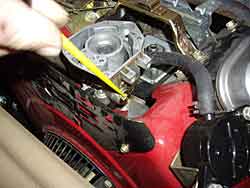
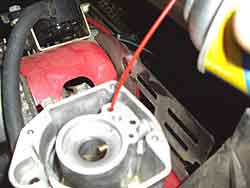
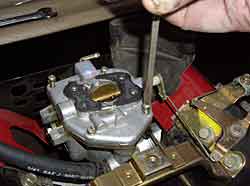
Remove these 4 screws holding top of carb. |
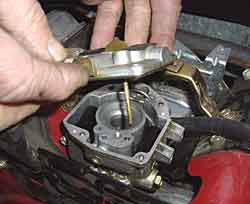 |
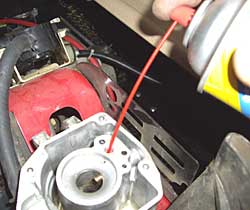
Lift top of carb upwards with care, not bending linkage |
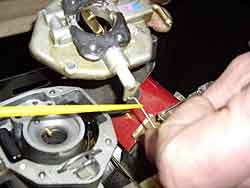 |
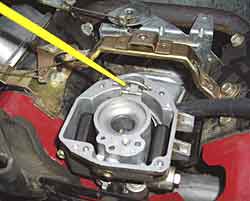
Remove linkage shown with yellow pointer. Set carb cover aside |
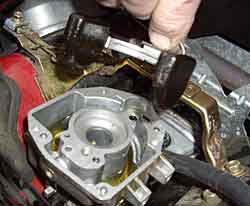 |
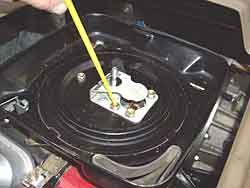
Lift
float assy upwards, taking care not to drop needle off. Note: Float assy, just lifts up. |
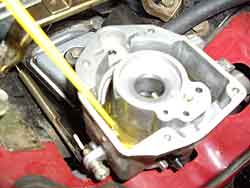 |
Note: Fuel in bowl |
 |
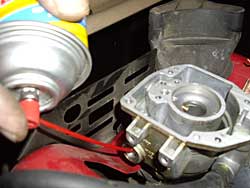
Remove fuel with rag, clean bottom of carb with carb cleaner Click on PHOTOS to see larger view |
 |
Unscrew
Mid range nozzle jet with small screwdriver, use care not to damage
threads in carb. |
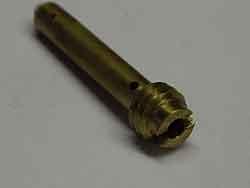 |
Clean jet, care to clean all pasages including top:
Note: when jet is clean you can see through it lengthwise. |
 |
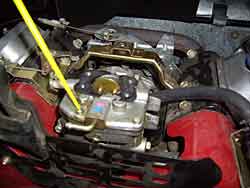
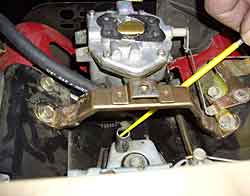
Bowl nut, used to acess high speed jet. Remove this nut. |
 |
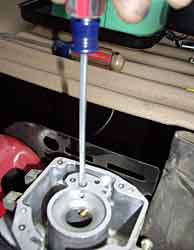
Spray carb cleaner in this hole untill cleaner comes out of high speed jet,
Note: when spraying in this hole, cleaner should go through high speed jet and drip into fuel bowl in area where you removed bowl nut in step above. |
 |
Spray
in hole where nozzle jet was removed, spray untill clean. repalce nozzle
jet at this time.
|
 |
Spray cleaner through this hole into high speed jet side carb
After cleaning jet, replace the bolt which allowed you to access the high speed jet |
 |
Reinstall float assy as shown, be sure to needle is correctly seated in seat. |
 |
Reinstall
carb cover with 4 screws, making sure linkage works freely.
|
 |
Rubber
hose from bottom of aircleaner base attaches at tube shown by yellow
pointer |
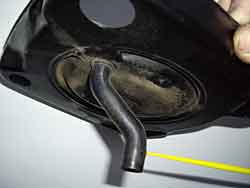 |
Air cleaner base vent tube (see yellow pointer) attaches to tube as pointed out in above step. |
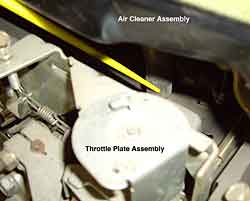 |
View of above air cleaner assy's rubber tube installed correctly |
|
Install
the 3 or 5 bolts with bracket attaching air cleaner base to carb, then
install air cleaner filter using thumb screw Note rubber vent tube under silver bracket and rubber L shapped vent coming up from blower housing. |
|
Install air cleaner cover |
|
Turn fuel on. |
| Note: An excellent time to install a new fuel filter, if you carb was very dirty, you should remove the fuel tank and clean it out. This is a basic carb cleaning not to be confused with a carb removal and professional overhaul cleaning. If
you have any questions, you welcome to contact us at richard@route6x6.com Replacement
parts available at RICHARD'S
RELICS
|
|
| Home | About This Site | New Toys | Information Bank | What's New | Blast From The Past | Museum | Tips | Photo Gallery | How To | FAQ'S | Memory Lane | Classifieds | Discussion Boards | Cartoon | Events | Shoppe | Parts for ATV's | Owner Registry | Links Webmaster: For questions or comments
|
|
