 |
|
|
Step - by - Step How to MAX IV Axle Set Screw
This guide is for MAX IV machines with splined set
screw axles.
Other machines such as MAX II, ARGO, HUSTLER use a similar sytem |
|
This
is another addition to our new how to series, we will ba adding more
every week, so check back often. You may also e-mail suggestions for
future how - to's to. richard@route6x6.com
|
|
 |
Always disconnect battery before servicing machine.
|
 |
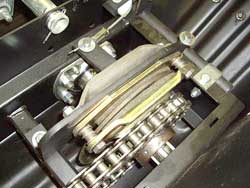
Remove disc brake cable cotter pin and swing cable out
of the way
|
 |
Click on PHOTOS to see larger view
|
 |
Remove the chains master link, unroll chain from sprocket
and set chain aside too.
|
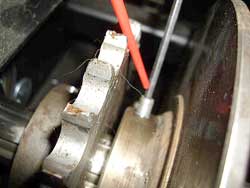 |
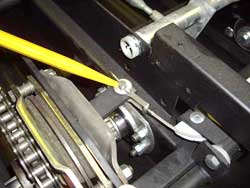
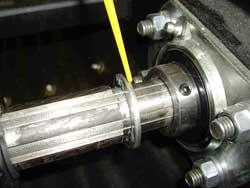
Locate set screws in both the disc brake rotor and sprocket assembly, remove these set screws.
Note:
some machines will have two set screws in each hole, one over the top
of the other, remove both. Click on PHOTOS to see larger view
|
 |
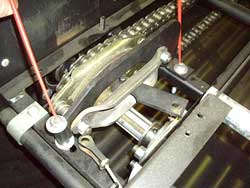
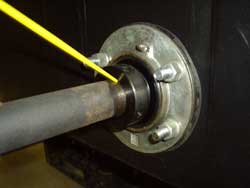
Working on the inside, center of frame area, remove the bolt, washers from end of axle.
Note: These bolts keeps axle from pulling out of the bearings as you drive.
Click
on PHOTOS to see larger view |
 |
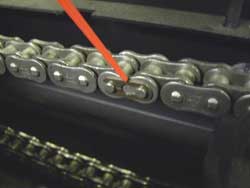
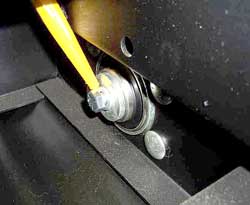
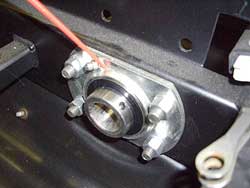
Locate and remove set screw in colar of inner bearing
Note:
See red pointer
Click
on PHOTOS to see larger view |
 |
Remove
outer locking collar and tap axle out See Removing locking collar bearings
|
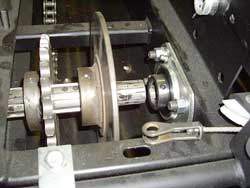 |
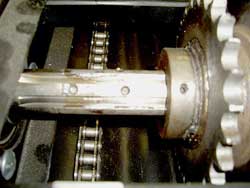
Axle
coming out
Click on PHOTOS to see larger view
|
 |
Note: Location and number of shims, this machine has one, some axles will have between 1 and 3 shims
|
 |
Note: Set screwholds in axle, make sure you remember which hole was used for both the spocket and disc brake rotor
|
 |
Now is a good time to check the inner bearing condition, procedure is same and the outer bearings.
|
We offer all parts shown here at RICHARD'S RELICS
If you have any
questions, you welcome to contact us at richard@route6x6.com Replacement parts
available at RICHARD'S RELICS
ATV Chassis parts page |
|
| Home | About This Site | New Toys | Information Bank | What's New | Blast From The Past | Museum | Tips | Photo Gallery | How To | FAQ'S | Memory Lane | Classifieds | Discussion Boards | Cartoon | Events | Shoppe | Parts for ATV's | Owner Registry | Links Webmaster: For questions or comments
|
|
